Course Details
No Pool, No Problem!
Are you dreaming of your dog’s first dock diving trial, but aren’t sure where to start? Or perhaps you’ve already got a good start but it's so hard to get pool time (weather, distance, cost)- and you've still got things to work on? Maybe the off-season has felt SO LONG and you want to help your dog get ready for the first trial of the year? Whether you are looking for a rock-solid head start or you’re a seasoned competitor wanting to level up during the off-season, success on the dock starts with the work you do on the ground.
The beauty of dryland training is that it is beneficial at every stage of the journey:
For beginners, if you want to ensure that your dog’s first impression of the sport is joyful, confident, and safe, you can give them a huge headstart before you even get to the pool that first time! Build body awareness and jump form, teach patterns in toy play and stays that transfer easily to the dock.
For more established competitors, you'll find dryland training helpful to build manners in the line-up, create warm-up routines and conditioning strategies that create bigger jumps. Dryland training can also problems with tracking or pop, hesitations, flat-jumping, slow-returns during speed games, struggling to 'mark' the bumper or sharking after a miss in air retrieve.
If you've got big goals this season, dryland gives your dog a solid foundation, the chance to fix problems, and improved fitness before and between pool visits!
What This Class Covers:
- Event Mechanics: We dissect the main competition games into individual skills taught on land. The nerdy foundation skills!
- Fitness & Conditioning: Targeted exercises to improve the strength, balance, and stamina required for explosive jumps.
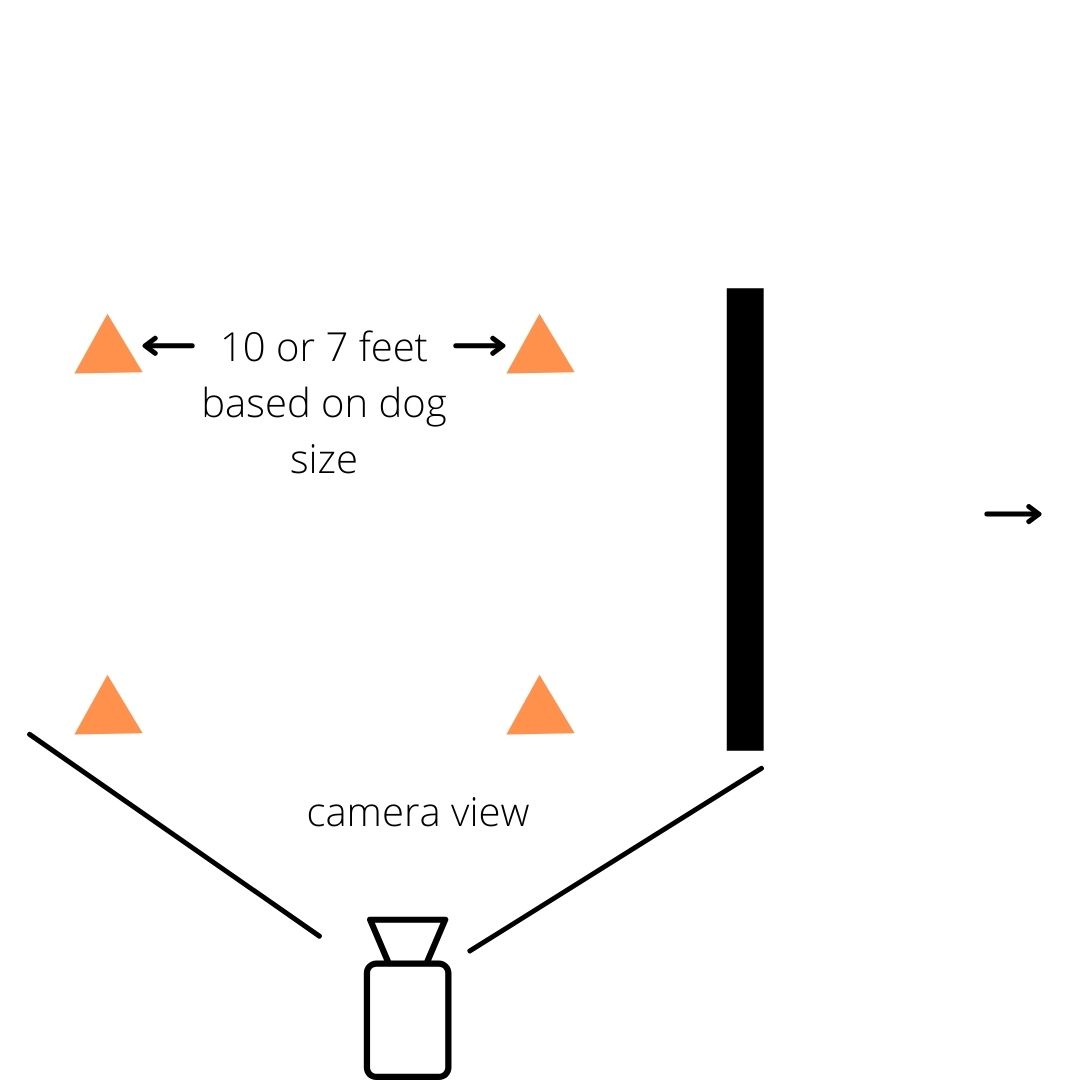
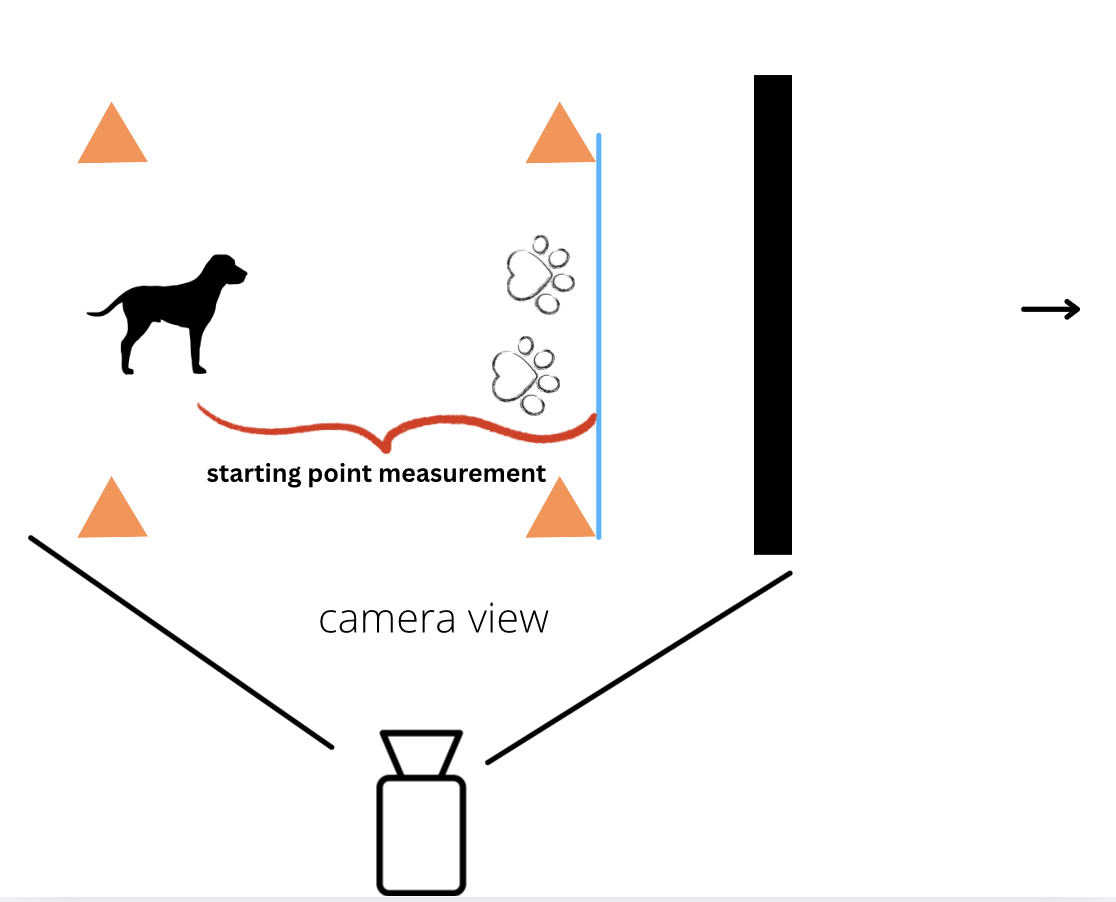
- Precision Teamwork: Refining your handling, timing. Determine correct striding for ultimate power and precision.
- Problem Solving: Using foundation games to fix common issues like flat jumps, hesitation, or tracking problems.
This is a dryland-only course. You do not need a pool for any exercises in this class. Most exercises can be done:
- In a small indoor space or average-sized backyard.
- On a non-slip flooring surface (mats, carpet, or grass).
- With basic gear like tug toys and high-value treats.
Note: There will be plenty of bending, tugging, and active play required for "homework." Gold students are welcome to post past pool videos for analysis, but all new skills in class will be developed on solid ground.
Teaching Approach
Each week will contain several subtopics with lectures containing written descriptions of each exercise and brief video examples. Many of the video examples will show both a dog in the learning stages as well as a more advanced dog in order that students can see how skills progress. Some lectures will also include analysis of actual dock diving in order jumps to better show how foundation skills fit in. Some lectures are more conceptual in nature but most will contain short homework assignments. Homework for each week is progressive. Some bonus reference lectures are included to help students transfer dryland skills to the dock when weather/access permits and will not require homework.
Feedback for gold and silver students is detailed and encouraging- typically, the feedback is provided in written form but occasionally screenshots with markups or video demos are provided in order to help clarify next steps. You will receive feedback on what is going RIGHT as well as what needs changing.
This class will have a Teaching Assistant (TA) available to help the Bronze and Silver students! Directions for joining can be found in the classroom after you register.
 Instructor: Erin Lynes
Erin (she/her) is a lifelong dog enthusiast from Quesnel, British Columbia, Canada. Erin is certified as a Karen Pryor Academy Training Partner, a Certified Professional Canine Fitness Trainer, a Licensed Family Dog Mediator, and as a Cani-Fit Leader, ...(Click here for full bio and to view Erin's upcoming courses)