Stress-Free Husbandry: First steps for more cooperative nail care, grooming, and more
This is an excerpt from the book Cooperative Care: Seven Steps to Stress-Free Husbandry by FDSA Instructor Deb Jones, PhD. Available now!
Step One for Cooperative Care: Place Conditioning
It is important to have a dedicated place in your home where you will practice the majority of your husbandry work. You want somewhere that your dog can easily recognize as a husbandry training location and that you don't use for any other purpose. This enables your dog to make decisions about whether or not he wants to participate, as well as understand what he can expect from you.
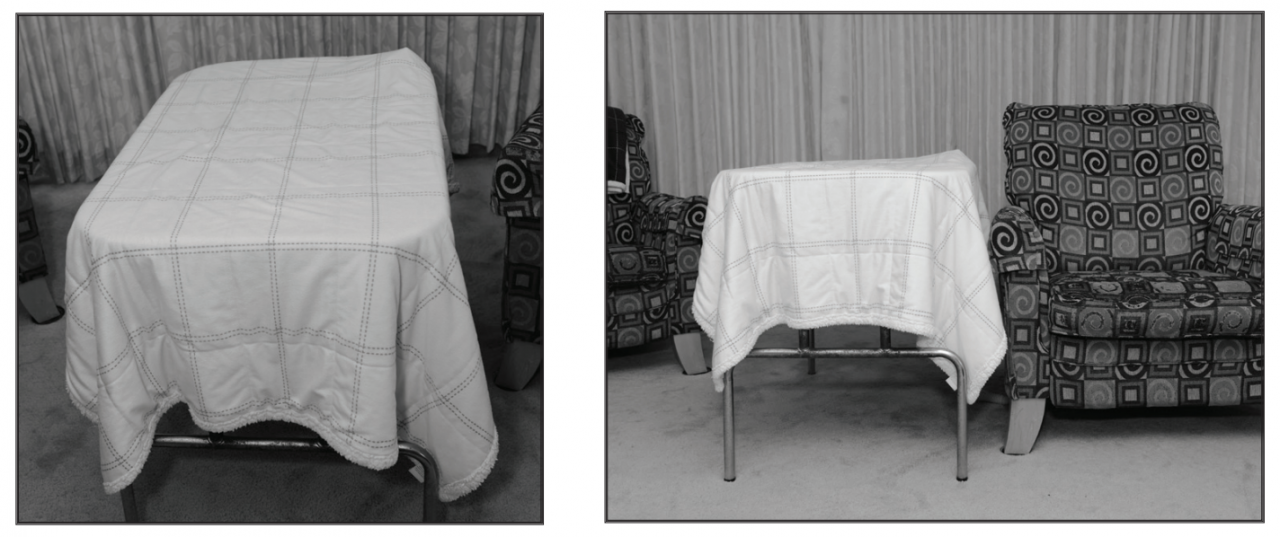
A grooming table is an ideal place. It is clearly recognizable to your dog as a training place and the height will keep you from ending up with a backache from bending over. If you don't have a grooming table, any elevated surface, such as an ottoman, can work. Choose a surface that is solid, sturdy, stable, large enough for your dog to easily lie down, and that has a non-slip surface. Your dog will be spending a lot of training time there so it should be as comfortable as possible. The most important aspect of your training place is that you set it up so your dog has a way to get on and off by himself. This is what gives him the ability to leave if he's uncomfortable. You can set up your table next to a chair or other piece of furniture to make it possible for your dog to jump up and down safely.
Occasionally, using an elevated surface simply doesn't make sense. For example, maybe you have a giant breed dog. In this case, it's a good idea to set aside a location with a specific floor covering to delineate the space. A foam yoga mat or some children's play tiles would make a good floor covering for your place. Again, make sure the area is large enough for your dog to lie down comfortably.
Loving the Training Place
It is important that your dog loves being in his training place, so once you have defined your training space, it's time to convince your dog that it is the best place he could ever imagine being. This will be done with pure classical conditioning. Your dog does not have to DO anything in particular, you are
simply working to make sure
he is in the best emotional state possible while in the training place. There are two exercises to accomplish this.
Cheese Bowl
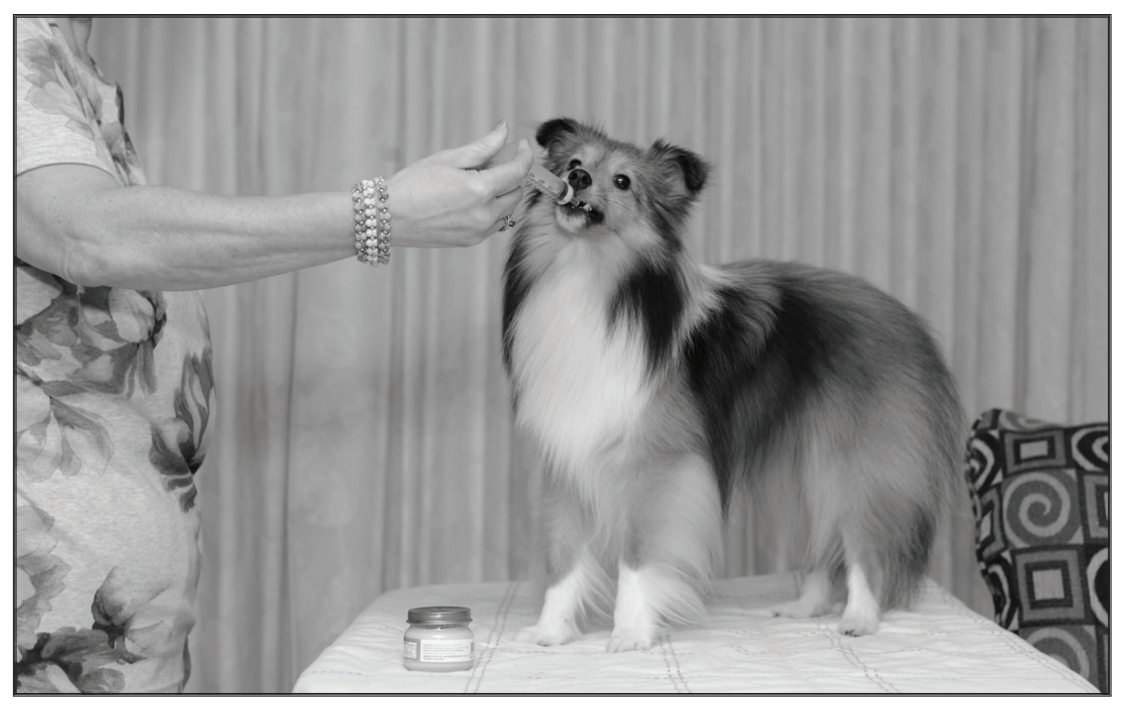
A cheese bowl is a small bowl with food smeared inside for your dog to lick. Although it's called a cheese bowl, you can use any food that your dog will enjoy, such as canned squeeze cheese, meat-flavored baby food, or peanut butter. You could also blend up your own meat mixture if you like. You will want to use this reinforcer sparingly, spreading a thin layer into the bowl and adding more as needed.
Set up your training place so your dog can climb on and off it on his own. Then prepare your cheese bowl. Show your dog the bowl, invite him to the training place, and when he's there, present him with the bowl. Let him lick it all up. Feel free to praise and pet him while he's doing this, but don't be too distracting. Once he's done licking, invite him to leave the place while you refill the bowl. Repeat this sequence three or four times per session.
That's it! Your dog is not required to do anything except lick the food out of the bowl. The goal of this exercise is for your dog to make the association between a specific place and a very special treat.
Repeat these sessions multiple times per day if possible. The more often you do this, the better all future training will go.
Baby Food Syringe
In addition to the cheese bowl you can also provide a special treat to your dog on the table using a large syringe and allowing your dog to lick the food off the tip. As your dog licks you can slowly depress the plunger to provide a steady stream of good stuff.
We use jars of meat-flavored baby food for this, but you can use any food that is thin enough to suck up into the syringe and then dispense easily. Begin with the plunger completely down and place the tip of the syringe into the food. Then slowly pull up the plunger to pull food into the syringe. Then let your dog lick the tip while you slowly depress the plunger. That's it! This method of providing a special treat is sure to make a huge impression with your dog.
Follow the instructions for the cheese bowl above. After several days of multiple repetitions of this on the table your dog should be insistent on being there.
Rapid-Fire Treats
After several days of working with the cheese bowl and baby food syringe, you can move to rapid-fire treats. Prepare your training location and obtain thirty small (as small as possible) soft treats. Ideally, these treats will be something that your dog will love and that he can swallow very quickly and easily.
Have ten treats ready, then invite your dog to his training place and feed him those ten treats, one after the other, as quickly as possible. When the treats are gone, tell him he's all done and encourage him to leave the place. Prepare another ten treats and wait close to your training location. If your dog returns on his own, follow the same process of feeding the ten treats as quickly as possible, then releasing him. If he does not return on his own, you can gently encourage him. Finally, prepare the last ten treats, wait again (encourage your dog back only if necessary), and repeat. After the third round, you are done for this session.
The goal with rapid-fire treats is for your dog to learn that moving into the training area will make you start the feeding process. You can do two to three sessions a day. After a few days your dog should start eagerly moving towards the training area whenever given the opportunity.
My students have reported that they will randomly find their dogs waiting in the training place, hoping that they will be noticed so that rapid-fire treats will start! If this happens to you, it means you are definitely doing it right!
If all goes well, within a week you will have classically conditioned your dog to LOVE your chosen training area. Excellent job! However, it never hurts to randomly go back to either of these exercises to continue to build value for the training place throughout the rest of the training process. Also, if your dog ever has an unpleasant experience in the training area, such as falling off the table, stop all other work and go back to this step for a week.
Step 1 checklist for Place Conditioning
- Dedicated grooming area has been clearly defined
- Cheese bowl practice in grooming area
- Baby food syringe in grooming area
- Rapid-fire treats in grooming area
- Dog LOVES grooming area!
The above post is an excerpt from the book Cooperative Care: Seven Steps to Stress-Free Husbandry by FDSA Instructor Deb Jones, PhD.
Having trouble trimming your dog's nails or bathing him? Is your dog stressed in the vet's office? Wondering how to make the process of grooming and veterinary care more comfortable both for you and your dog?
Then this is the book for you! Cooperative Care will cover seven main areas to help prepare your dog for all the necessary physical procedures that will keep him healthy and happy. The methods in this book are based on positive reinforcement and allowing our pets the opportunity to choose to opt in and participate in our conditioning sessions. When we take the time to carefully observe our dog's behavior, read their stress signals, and respect their communication with us, it's just amazing how quickly we can replace suspicion with trust. Our goal is to empower our dogs and help them gain confidence in the husbandry process. Spending time preparing your dog for typical husbandry procedures is one of the best gifts you can give him!
Click here to pick up your copy today!
About the author

Related Posts
By accepting you will be accessing a service provided by a third-party external to https://www.fenzidogsportsacademy.com/